REVIEW · RIO DE JANEIRO
Rio de Janeiro: Pedra da Gávea 7-Hour Hike
Book on GetYourGuide →Operated by S2 Rio - Tours Rio de Janeiro · Bookable on GetYourGuide
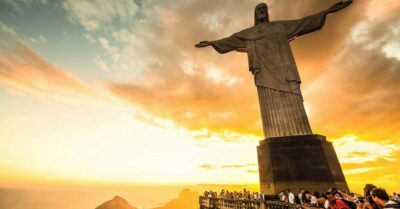
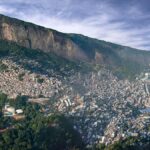
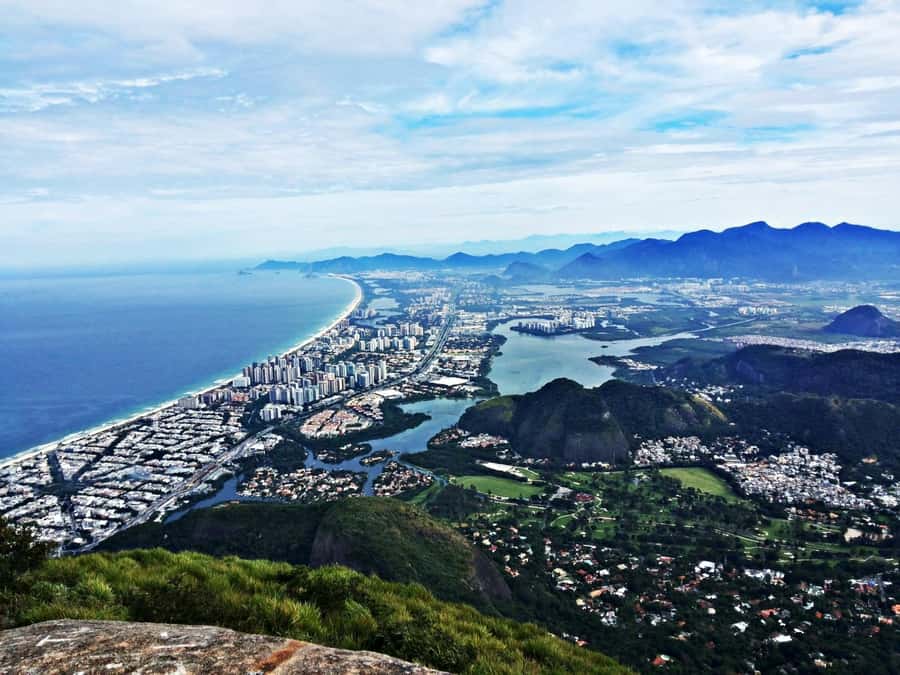
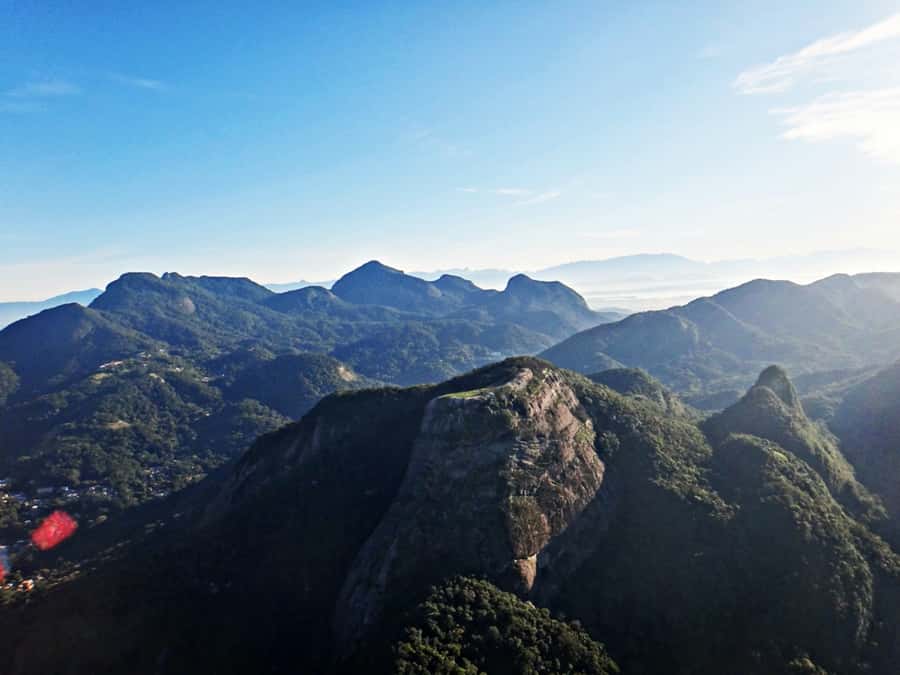
A rock-climb edge makes Rio feel wilder. Pedra da Gávea lifts you from near sea level into Tijuca National Park, reaching about 840 meters for big views over the city.
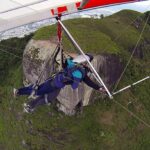
I love the certified eco-adventure guidance plus specialist climbing equipment that makes the toughest bits feel safer and clearer.
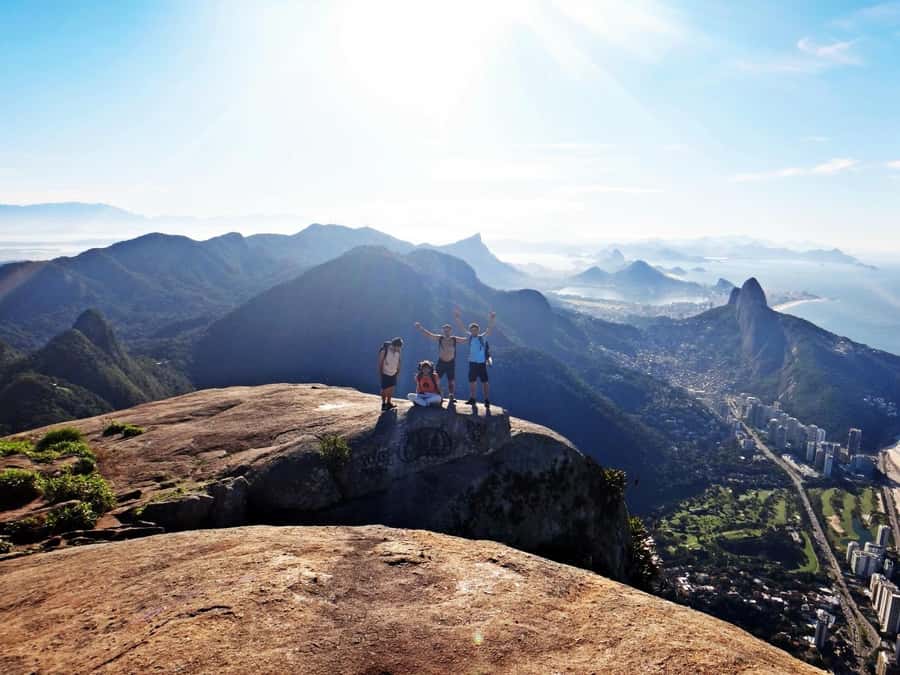
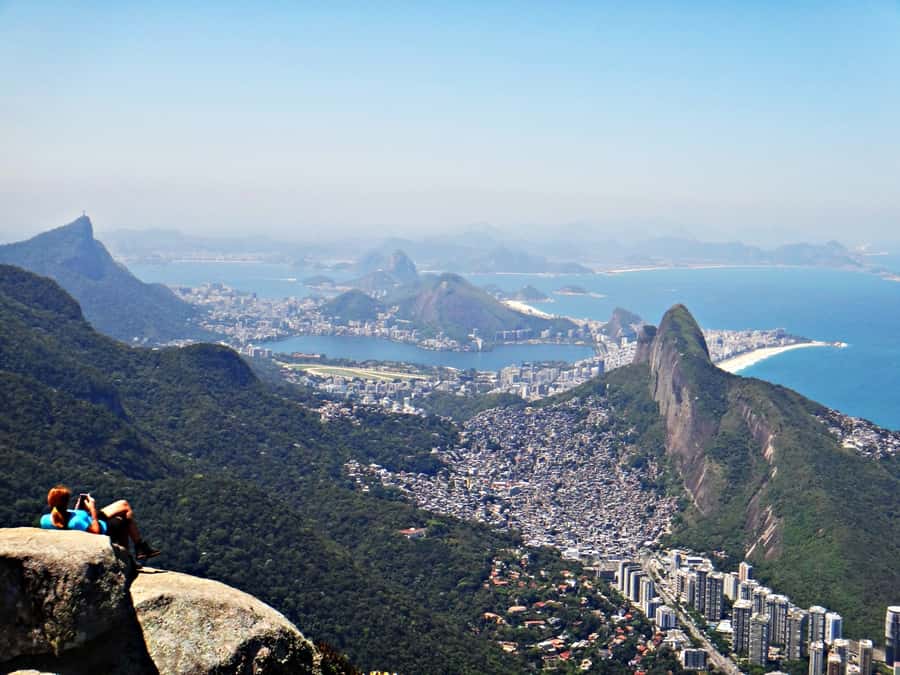
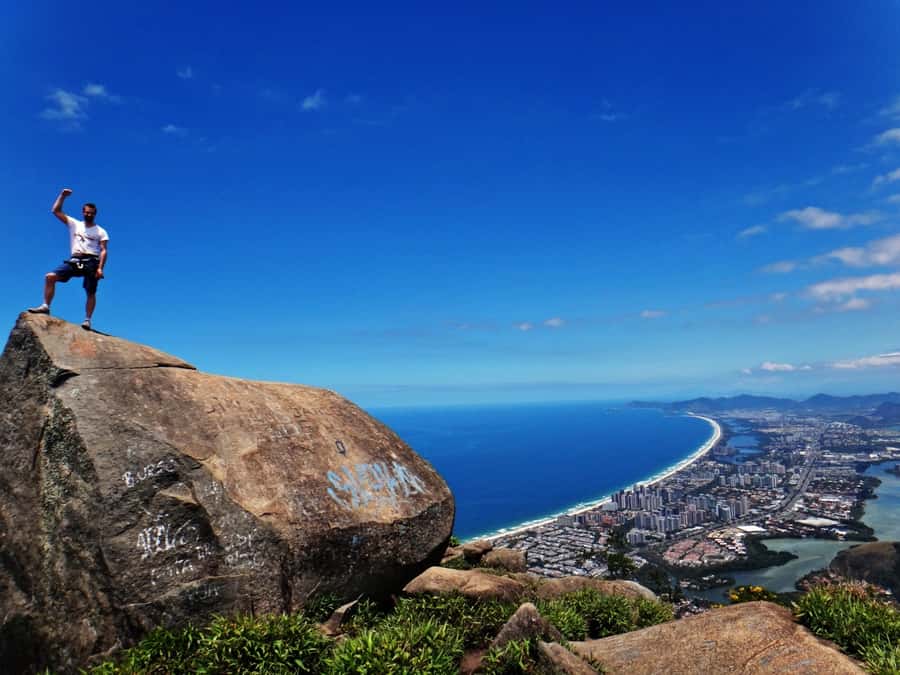
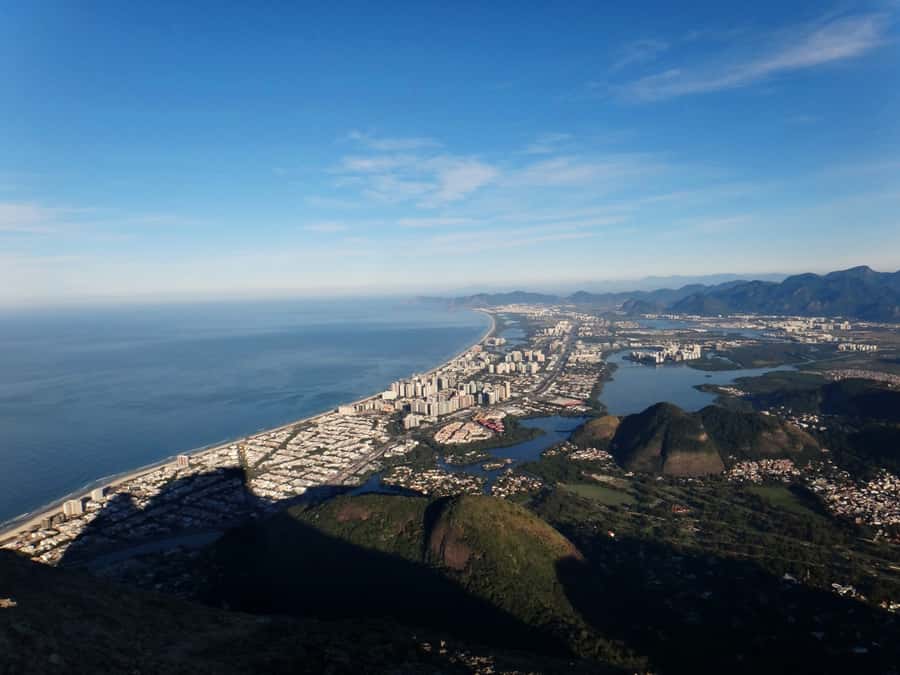
The second big win is what you see at the top. From the summit, you get sweeping panoramas over Rio’s south and west areas, and guides help with photos and video along the way.
The one drawback: this is a difficult hike with scrambling and basic climbing, so you’ll need a decent fitness level and comfort with height exposure.
In This Review
- Key highlights that make this hike worth planning
- Pedra da Gávea: why this monolith hike is uniquely Rio
- The schedule: how an 8-hour day turns into a ~3-hour ascent
- Carrasqueira: where the safety gear earns its keep
- Guides: what “eco adventure” support feels like on the rock
- Fitness and nerves: the real difficulty check before you go
- What the summit experience is really like
- Packing: bring what you need, skip what slows you down
- Getting there: the meeting point and the one missing piece
- Should you book Pedra da Gávea? My decision rule
- FAQ
- How long is the hike to the summit?
- Is previous rock-climbing experience required?
- What climbing parts are included?
- What’s included in the price?
- What should I bring?
- Where do we meet, and is private transportation included?
- What happens if the weather is bad?
Key highlights that make this hike worth planning
- Sea-level start to ~840 m in Tijuca National Park, on a famous monolith
- Carrasqueira section with provided safety gear plus about 30 meters of basic climbing
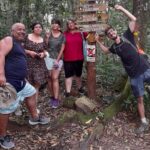
- Small group, max 6 people, with an instructor who keeps you moving and together
- Amazing summit viewpoints over Rio’s south and west
- Photo and video help from the guide, so you’ll have real souvenirs of the climb
- Mostly shaded stretches, which helps on hotter Rio days
Pedra da Gávea: why this monolith hike is uniquely Rio
Pedra da Gávea is one of those mountains people talk about in Rio for a reason. It’s a huge rock monolith rising from right near sea level, and the route takes you through Tijuca National Park as you climb toward roughly 840 meters.
What makes this hike feel special is the mix. You’re not just walking a forest trail. You’re moving from dirt-and-stones hiking into hands-on scrambling, then into short, more technical climbing. That shift changes the whole rhythm of the day, and it’s why the payoff at the summit lands harder than it does on a simple viewpoint hike.
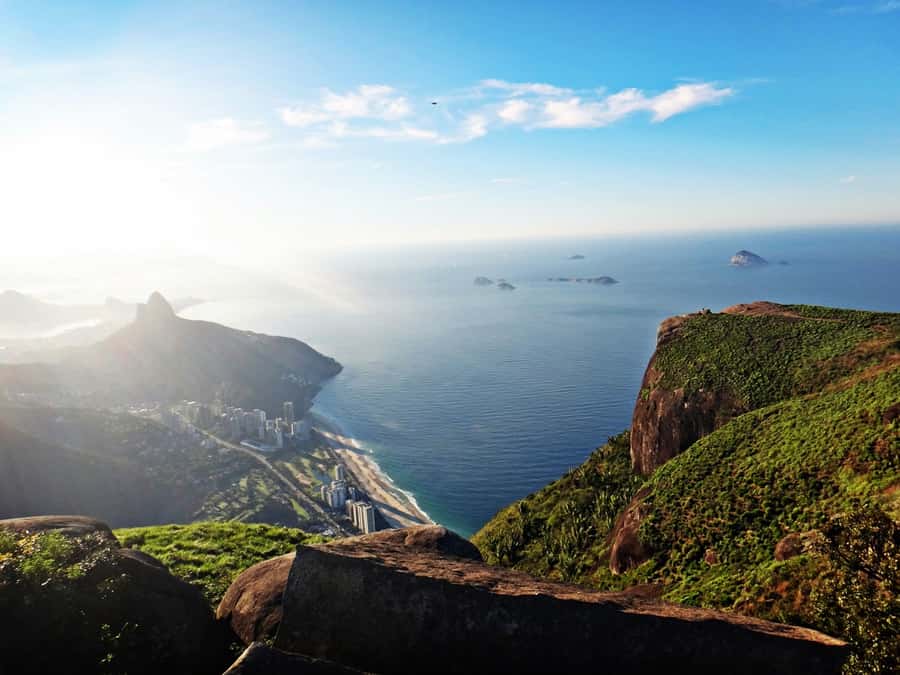
And the views are the point. When the weather cooperates, you’ll look out over Rio’s south and west districts—exactly the kind of skyline-and-coast perspective you don’t get from inside the city.
You can also read our reviews of more hiking tours in Rio De Janeiro
The schedule: how an 8-hour day turns into a ~3-hour ascent
The experience is listed as about 8 hours, but the mountain work is concentrated. The hike to the top is about 3 hours. That means you spend a real block of time earning the views, then you still have time for the fun parts—pauses, photos, and the descent back down.
Here’s how to think about your day:
- Plan a full half-day commitment. Even if you climb fast, you’re still doing the full round trip plus time on the summit.
- Expect delays at climbing points. The route includes technical sections, and they take time to pass safely as the guide organizes the group.
- Don’t count on a relaxed stroll pace. This is an active adventure, not a put-your-feet-up nature walk.
Some people finish quicker than expected if they move confidently. Others take longer if they’re careful on the hands-and-feet sections. Either way, the climb-to-top estimate of about 3 hours is the best mental anchor.
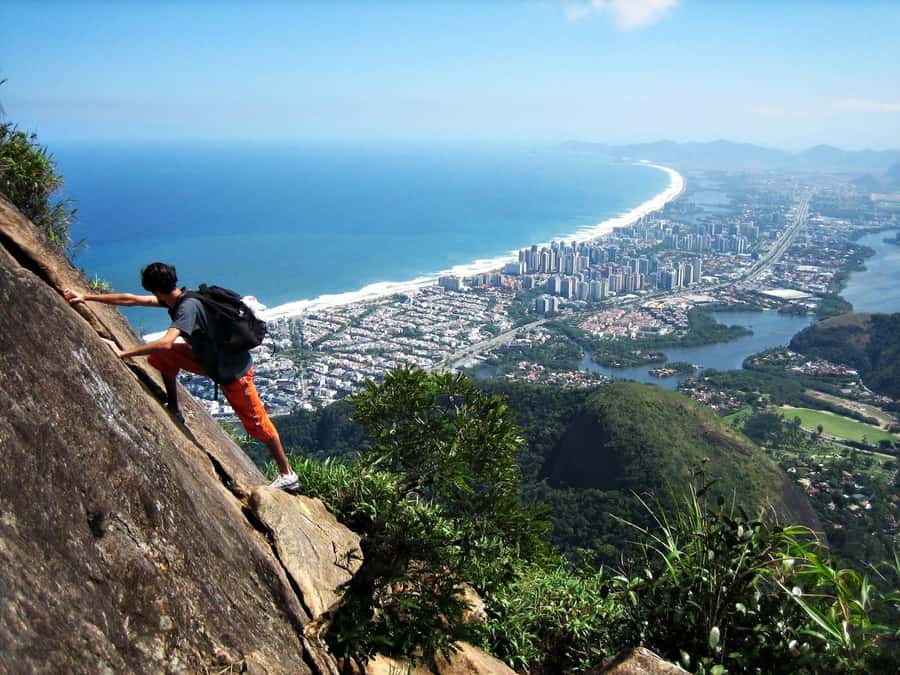
Carrasqueira: where the safety gear earns its keep
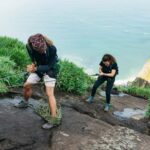
The route includes a section called Carrasqueira. This is the part that turns the hike from challenging to clearly adventurous.
You’ll use the safety equipment provided by your instructor. The route includes basic rock climbing that’s described as about 30 meters in height, and that’s the area where you’ll most feel the difference between “hiking” and “mountain climbing.”
What that means for you:
- You should expect to use your hands, not just your legs.
- You’ll want shoes that grip well, because your weight shifts onto rock surfaces.
- You need to follow the guide’s instructions closely—this isn’t the place for improvising.
Also, the guides are there for more than gear. They help you place your steps and cross the scarier sections with organized pacing. If you’ve ever been on a trail where you feel like you’re guessing your footing, this hike is the opposite: it’s managed, step-by-step, especially around the climbing segments.
Guides: what “eco adventure” support feels like on the rock
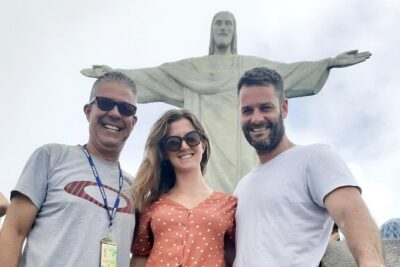
This tour is led by a guide specialized in eco adventures, and the instructor speaks Spanish, English, and Portuguese. You also get a small group (limited to 6 participants), which matters a lot on technical ground. Fewer people means the guide can give more direct attention when you’re moving through exposed spots.
The best part of the guiding here is the human factor:
- Guides help you stay calm when the route asks for hands-on movement.
- They keep the group together so nobody gets stuck waiting too far behind.
- Many guides also take photos and video during the hike, including near the summit, and share the files at the end.
You’ll feel the difference if you’re new to this type of terrain. Even though no previous rock-climbing experience is required, the day still demands basic fitness and comfort using your body in new ways. The guide’s job is to make that doable.
And yes, the guide can turn you into a better photographer subject. One of the nicest “souvenir” touches is having images that capture you at the summit without you having to fight with your phone at the wrong moment.
Fitness and nerves: the real difficulty check before you go
This hike is labeled difficult. That’s not just marketing language—it’s about how steep and technical the route feels, even though it doesn’t require prior climbing experience.
You should be ready for:
- Steep effort and sustained uphill walking.
- Scrambling and light climbing in some stretches.
- The need to handle height exposure in the climbing areas.
If you don’t do well with heights, take that seriously. The climb is manageable with guidance, but your comfort with exposure matters. The safest route in the world still requires you to focus, and if your mind is panicking, that’s when people lose control of their footing.
Also keep in mind pace. This isn’t a tour where the group moves exactly at your preferred speed. The climbing sections can require patience, and you’ll follow the guide’s flow to keep things safe.
A practical way to decide: if you can handle a tough hike and you’re willing to slow down on steep sections, you’ll probably be fine. If you’re trying to conquer fear first, you may want a different Rio hiking option.


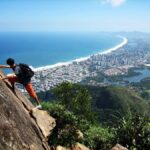
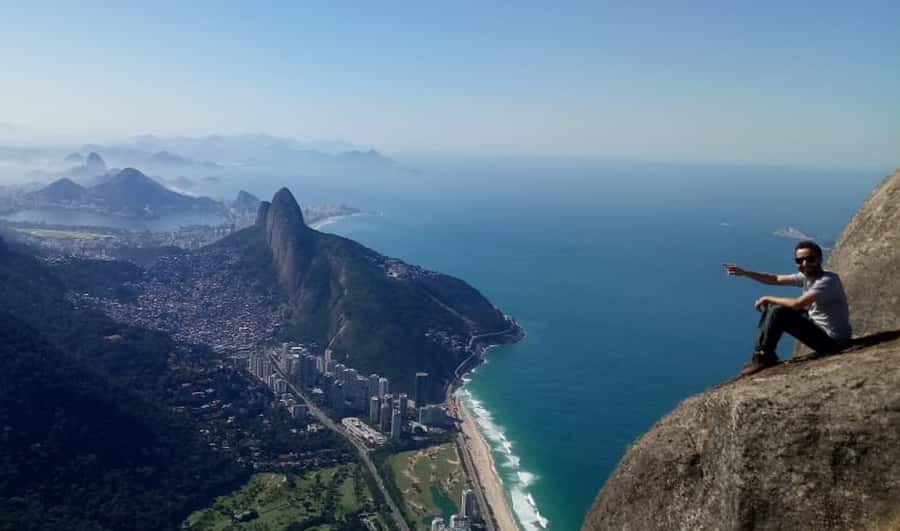
What the summit experience is really like

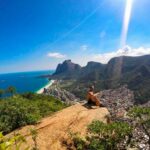
The summit is the payoff, but it’s not just “walk up and look around.” You’ll earn the viewpoint through technical ground and steep walking, then get time to take in the panoramas over Rio’s south and west areas.
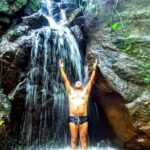
A key variable is weather. On clear days you’ll see far. If clouds or fog roll in, you might lose some of that skyline view even if you reach the top. That doesn’t ruin the hike—because the climbing experience and the forest-to-rock contrast still make it memorable—but you should go with the mindset that visibility isn’t guaranteed.
When visibility is good, the summit feels like a command center over Rio. It’s the kind of viewpoint that makes your photos look “ridiculous” in a good way, because the city scale is obvious from above.
Packing: bring what you need, skip what slows you down
For this hike, packing is part of safety. Here’s the practical list you should treat as non-negotiable:
Bring:
- At least 3 liters of drinking water per person
- Light snacks
- Light clothing for hiking
- Sunglasses, sun hat, and sunscreen
- Insect repellent
- Shoes with good grip
Do not bring:
- Open-toed shoes
- Oversize luggage or large bags
- Pets
The reason for all this is simple: the day is physically demanding, and technical sections don’t leave much room for fixing mistakes. If your shoes slip, that becomes a problem fast. If you run low on water in the heat, you’ll feel it in your climbing confidence.
A small strategy that helps: keep your sun protection easy to reach, because you’ll want it before you feel cooked.
Getting there: the meeting point and the one missing piece
You meet at Estrada Sorimã, 932 – Itanhangá, Rio de Janeiro. Private transportation is not included, so you’ll need to plan your own way to the meeting point.
That matters because the hike runs like a tight schedule. You don’t want to be arriving stressed and late, especially when the technical climbing requires everyone to start focused and ready.
If your plans are flexible, build in extra time to reach Itanhangá. It’ll make the morning smoother and help you start the hike feeling in control.
Should you book Pedra da Gávea? My decision rule
Book it if:
- You want a Rio hike with real adventure elements, not just a viewpoint walk
- You’re fit enough for a steep, difficult trek
- You’re okay using your hands sometimes and following a guide closely
- You’ll appreciate small-group attention and the chance to get photos/videos from the top
Think twice (or choose another option) if:
- You’re uncomfortable with heights or exposed climbing
- You need a slow, laid-back pace
- You don’t have shoes with strong grip or you can’t commit to carrying enough water (at least 3 liters)
This is a smart value for the $56 price tag because you’re paying for much more than a hike: you’re getting specialist climbing equipment, an eco-adventure guide, and the kind of small-group management that matters when the route gets technical. If you want the “only in Rio” mountain moment, this is one of the best ways to earn it.
FAQ
How long is the hike to the summit?
The hike is about 3 hours up to the top, with additional time for the climb sections, photos, and the walk back down.
Is previous rock-climbing experience required?
No previous experience is required. The hike is considered difficult and includes some light climbing and a basic climbing segment, but you’ll be guided.
What climbing parts are included?
You’ll trek through the Carrasqueira section using safety equipment provided by your instructor, and you’ll face a basic rock climbing challenge of about 30 meters.
What’s included in the price?
The price includes a specialized eco-adventure guide and climbing equipment.
What should I bring?
Bring at least 3 liters of drinking water per person, light snacks, light clothing, insect repellent, sunglasses, sunscreen, and a sun hat. Wear shoes with good grip and avoid open-toed shoes.
Where do we meet, and is private transportation included?
Meet at Estrada Sorimã, 932 – Itanhangá, Rio de Janeiro. Private transportation is not included.
What happens if the weather is bad?
The activity can be cancelled in the event of bad weather.